You've launched a SaaS product, polished the landing page, and now you're staring at a blank video brief. The usual mistake is trying to make one demo serve social feeds, your homepage, sales follow-ups, and onboarding at once. That produces a bloated asset that performs none of those jobs well.
A SaaS product demo video should be split into two deliverables: a 15-second launch teaser for attention and a 60 to 120-second walkthrough for evaluation. Automate the teaser when speed and repeatability matter, but keep the longer walkthrough manually scripted and recorded when persuasion depends on a real workflow.
The Two Demo Videos You Actually Need
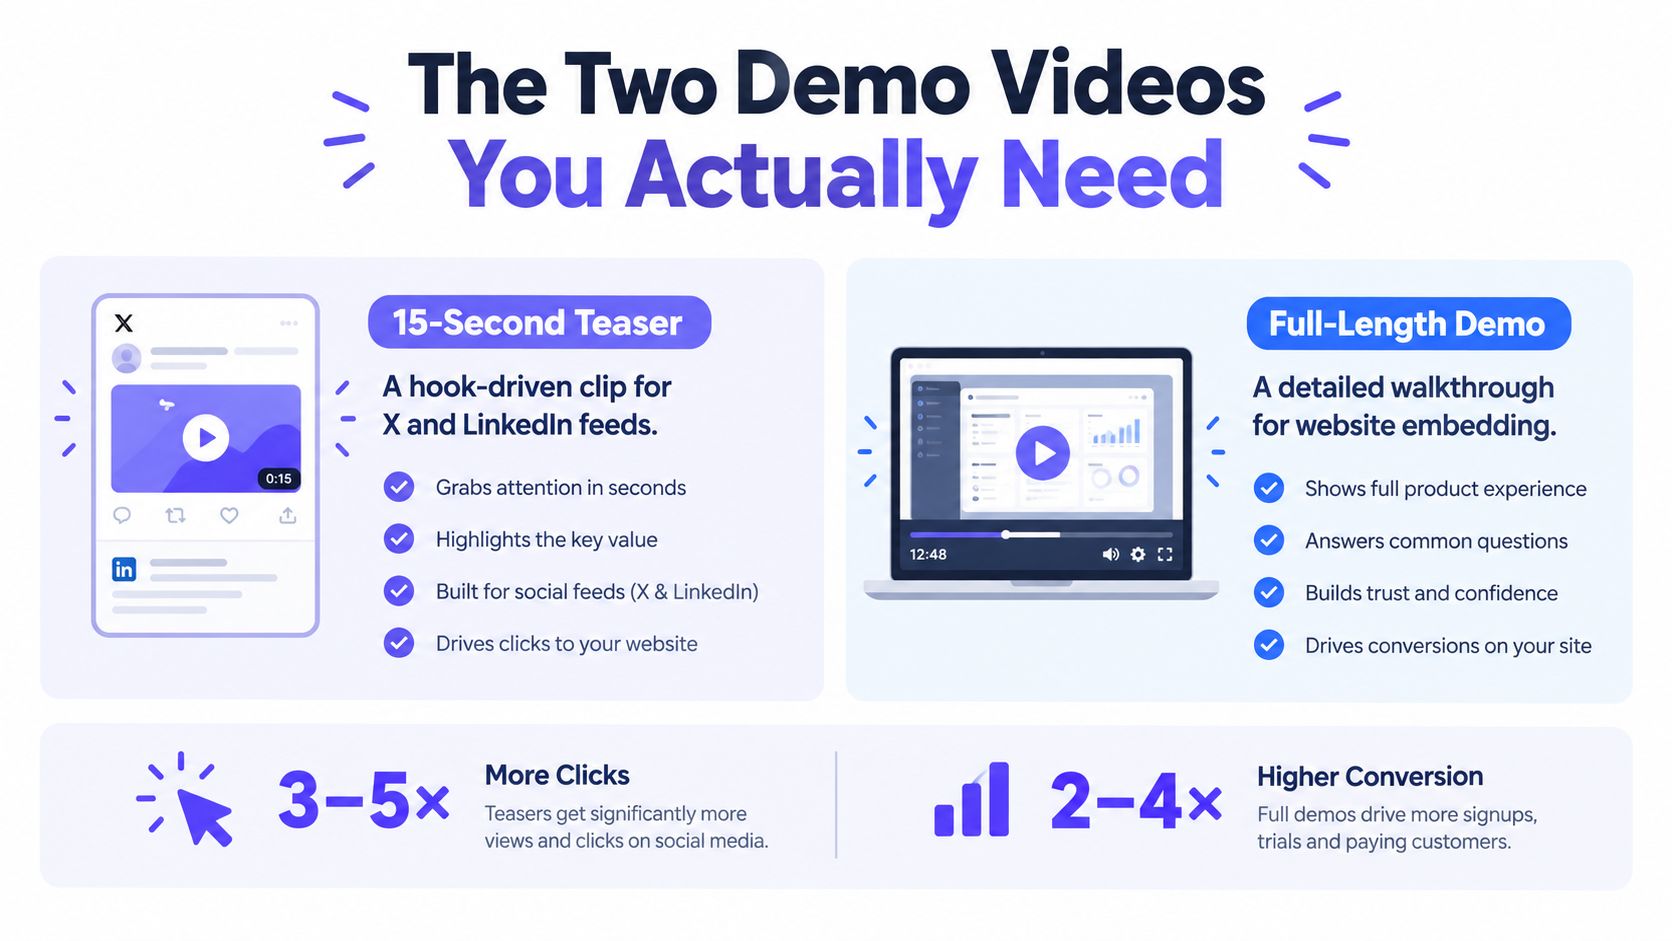
Most founders treat a demo as one asset. They write one script, record one walkthrough, then cut it into awkward fragments for every channel. That approach confuses two different jobs. A teaser earns the click. A walkthrough earns the next step.
The 15-second teaser belongs in the feed. Use it on X, LinkedIn, and short-form feeds where the viewer is scrolling quickly and autoplay is muted. Show one sharp product claim. Do not attempt a full feature tour. A viewer should understand the problem, see the product doing something useful, and know where to click.
The longer demo belongs on pages and in follow-up flows. Use a 60 to 120-second version on a landing page, Product Hunt, YouTube, sales follow-ups, and onboarding emails. It needs a clear problem-to-solution arc, a real workflow, and a soft CTA. B2B buyers often prefer video during evaluation, and one industry summary reports that 70% of B2B buyers watch video during purchase decisions and 96% consider video important when deciding whether to move forward with a vendor. Those figures come from video marketing ROI benchmarks.
Scope them as separate products
The teaser needs visual speed, large on-screen text, and a single claim. Narration isn't required. The longer video can use a more patient rhythm, spoken explanation, cursor movement, and context around why each action matters.
Their production standards also differ. The teaser should look consistent across repeated launches. The walkthrough must feel specific to the product and credible enough for someone deciding whether to start a trial or book a conversation.
A useful comparison is the difference between a shop window and a guided visit. The window earns attention from people passing by. The visit answers questions from people already considering the purchase.
For a practical breakdown of the distinction, use this guide to compare a product demo video with a teaser. Decide which asset you need before you write a sentence. Don't ask one edit to carry two separate conversion jobs.
Scripting the 15-Second Teaser That Survives the Scroll
A short teaser fails when every second tries to explain the company. You don't have room for the founding story, the full category definition, and six features. You have room for one problem, one proof point, and one action.
Write the script before recording anything. Put timestamps, on-screen text, visual direction, and the CTA in one document. If the words change after recording, the edit becomes expensive and the product footage rarely saves a weak premise.
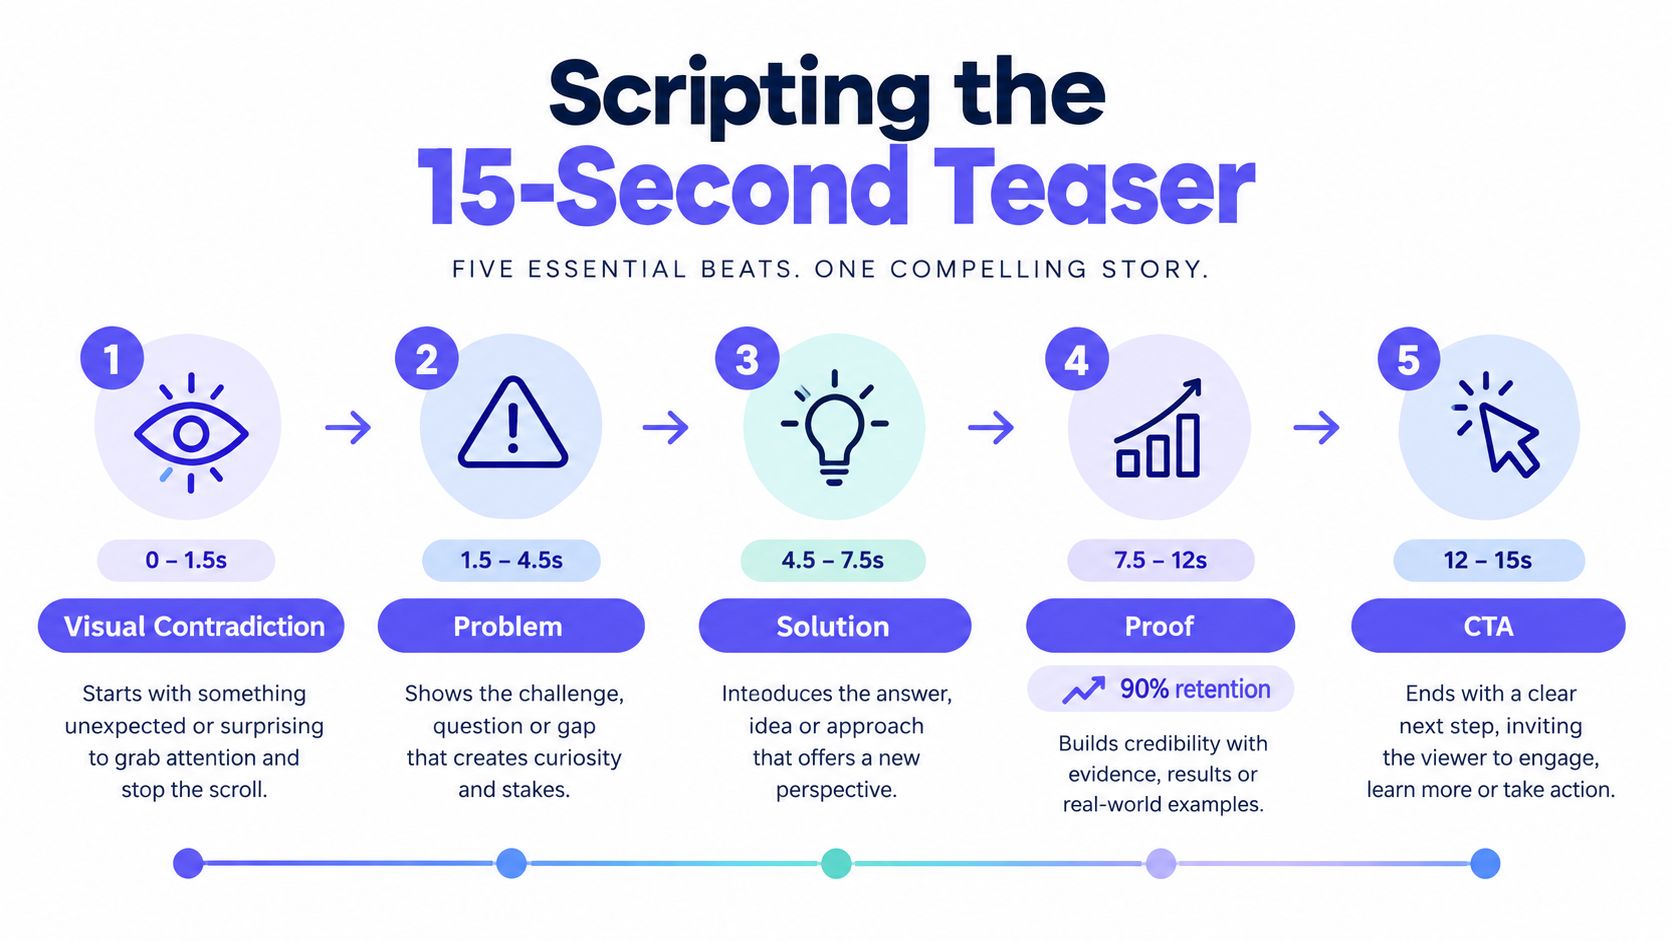
Use five beats
Hook, from 0 to 1.5 seconds. Open with a visual contradiction or a sharp category claim. “Your analytics dashboard shouldn't need a training session” is stronger than “Meet our new platform.” Use no more than a short phrase. The first frame must work even before the viewer reads the rest.
Problem. State the pain in one line. Skip the backstory. “Founders lose launch feedback across five spreadsheets” gives the viewer a reason to keep watching. Keep the words short enough to read while the screen changes.
Solution reveal. Show the product doing the exact thing you just described. Don't display a generic dashboard. Show the action that resolves the problem, such as collecting feedback in one place or turning a rough brief into a publishable asset.
Proof. Use one screenshot, one UI moment, or one concrete result from the product. Avoid a pile of claims. A single visible workflow is more persuasive than a sequence of decorative screens.
CTA. End with the logo and one direct action. “See the workflow” works better than “Learn more.” Keep the final frame still long enough to read.
Captions matter because feeds autoplay muted. Burn the key words into the video, but don't turn every frame into a paragraph. Use high contrast, one idea per screen, and motion that supports the message rather than competing with it.
Practical rule: If the teaser needs a second paragraph of explanation, the product claim isn't narrow enough.
Your script should also define the cadence. The hook gets the fastest visual change. The problem holds briefly. The product reveal gets the clearest screen space. The proof earns a moment of stillness. The CTA closes without adding another feature.
A strong brief improves first drafts because it forces the writer to specify audience, pain, evidence, and action before production begins. This content brief template for better first drafts is useful when your team keeps producing polished but unfocused scripts.
Use this product video script guide when you need a reusable structure. Don't shoot footage until one person outside the company can repeat the product claim after reading the script.
Recording and Editing a Full-Length Demo
The longer walkthrough deserves a different production process. Record it like a guided product lesson, not like a stretched teaser. The viewer should see a real workflow and understand why each step changes the outcome.
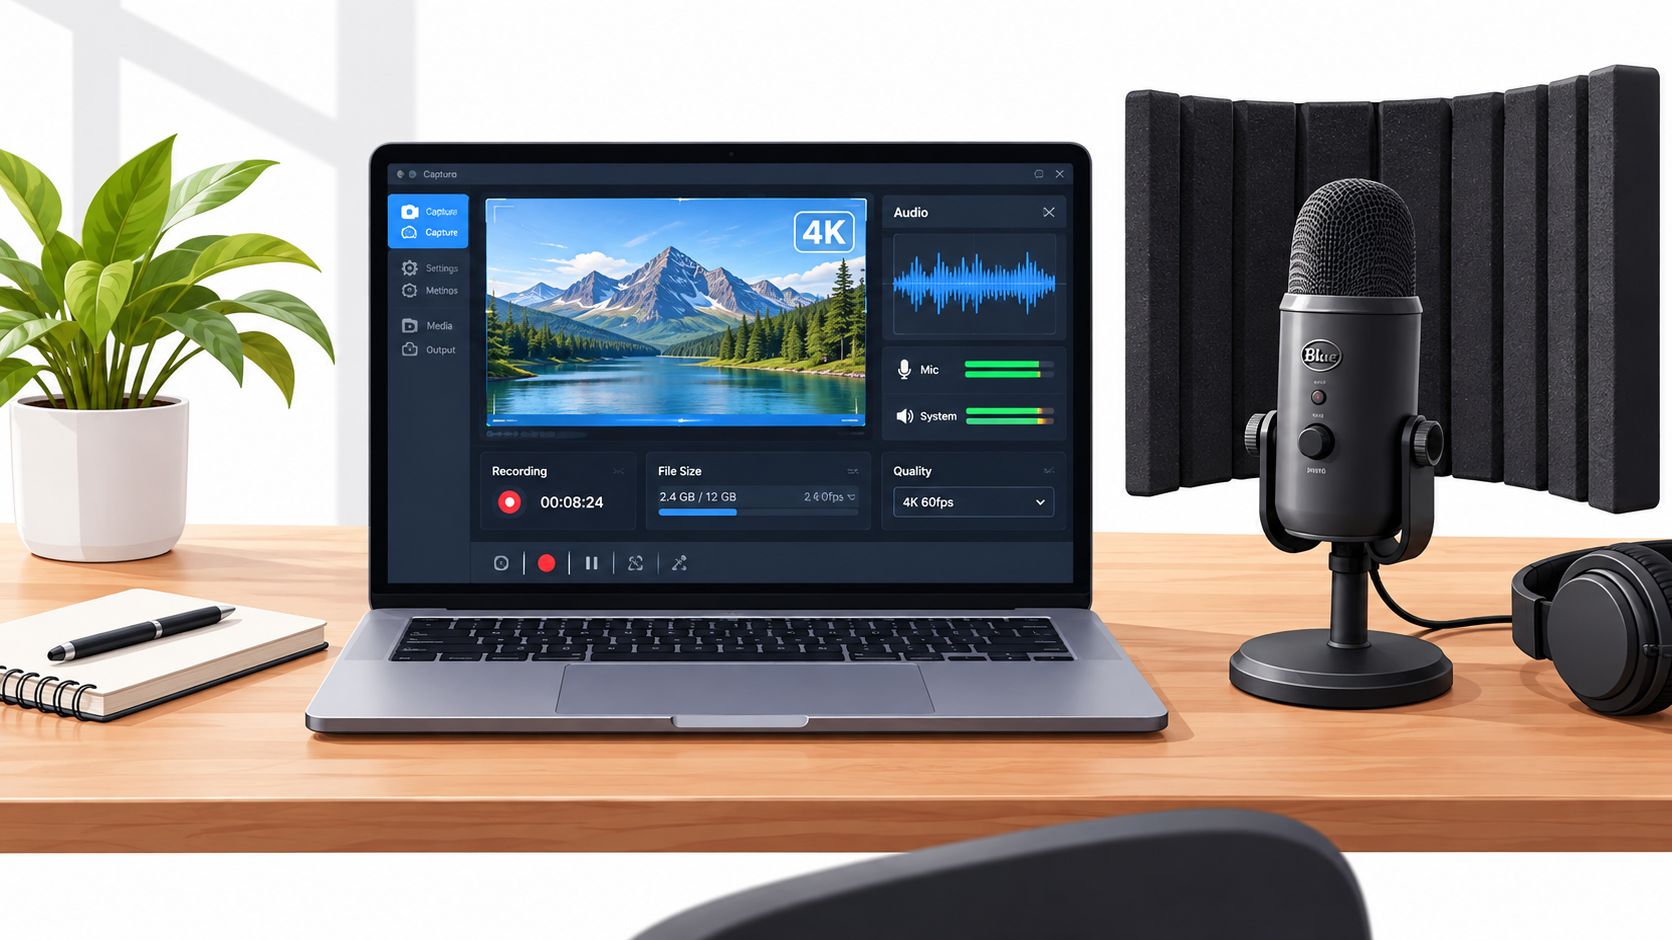
Start with a clean recording environment. Capture at 1080p or 4K, use 30 frames per second or more, choose a clean microphone, and record in a quiet room. Hide notifications, remove personal data, and prepare the exact account state you want the viewer to see.
Record in segments, not one heroic take
Divide the script into logical sections:
- Context: Name the user and the problem.
- First action: Show the shortest route to value.
- Workflow: Demonstrate the product with realistic inputs.
- Proof: Show an output, dashboard state, or saved result.
- Next step: Invite the viewer to try the relevant action.
Record each segment cleanly. A single continuous take makes small mistakes costly and encourages founders to leave weak setup narration in the final cut. Segments let you replace one explanation without recording the whole walkthrough again.
The product proof should include details that a screenshot can't establish. Show a real customer workflow or a realistic internal workflow. Reveal a dashboard or output the viewer hasn't already seen on the landing page. Include one moment where the product handles something that initially looks difficult or impossible.
Before recording, browse trending products for launch examples. Don't copy their scripts. Study how quickly they establish the product category, what their first frame communicates, and whether the CTA matches the page receiving the traffic.
Edit for momentum
Open with the strongest useful moment, then provide the context. A cold-open jump cut can show the completed result before the walkthrough explains how the viewer gets there. Remove greetings, cursor searching, loading pauses, and narration that merely describes what the screen already makes obvious.
Keep transitions under one second. Place the strongest visual around the midpoint, where viewers often decide whether to continue. Use zooms only when the interface detail is hard to see. Motion should guide attention to the action, not decorate empty space.
This guide to remote video production can help you prepare the environment when you're recording from a home office or distributed team setup.
Export a 1080p master file, a separate captions file, and platform-specific cuts. Keep the master clean. Create shorter versions from the same project rather than forcing the full walkthrough into every channel.
A long video isn't automatically more persuasive. Research coverage based on Wistia data reports that 65% of viewers finish videos under one minute, compared with 20% for videos longer than 20 minutes, while separate B2B coverage identifies 30 seconds to 2 minutes as the most effective range for many marketers. See the product demo video length and production benchmarks for the underlying context.
Automation Versus Manual Production
Make the automation decision per deliverable, not per company. A teaser is repetitive and low-risk per asset. A longer walkthrough carries more persuasion load and exposes generic writing immediately.
ShipTeaser accepts a product URL and produces a 15-second, 1080p, silent motion-graphics teaser in about two minutes. The workflow analyzes page copy, screenshots, and visible brand cues, then follows five scenes: hook, problem, solution, proof, and CTA. The output is available in 16:9, 1:1, and 9:16, with an optional music bed. It doesn't provide avatars, voice-over, narration, screen recording, stock footage, text-to-video from a prompt, dubbing, subtitles, translation, clip trimming, or a video editor timeline.
Compare the production paths
| Path | Best For | Turnaround | Cost Band (USD) | Hard Limit |
|---|---|---|---|---|
| Fully manual | High-stakes walkthroughs and founder-led launches | Days to weeks | Variable | Slow revisions and inconsistent availability |
| Hybrid manual | Founder records, specialist edits | Days | Variable | The editor can't fix a weak product story |
| Fully automated | Repeated short teasers and launch variations | Minutes | ShipTeaser plans range from $99/mo to $199/mo | Doesn't create a narrative walkthrough |
| Hybrid automated | Automated teasers plus an outsourced long demo | Minutes for teasers, days for walkthrough | Combined and variable | Requires two production systems and review standards |
The fully manual route gives you control over tone, pacing, and unusual product stories. It also creates scheduling friction and more revision cycles. Use it when the founder's explanation is part of the product's credibility.
The hybrid route is usually the sensible choice for a longer demo. You write the story and record the workflow. An editor removes dead time, improves emphasis, formats captions, and exports the cuts. The trade-off is coordination. A rushed brief produces a technically clean video with the wrong argument.
A fully automated route works for teaser volume. ShipTeaser's current plans are $99 per month for one video per week, $149 per month for two videos per week, and $199 per month for four videos per week. The first video is free, and no credit card is required. Those details are stated in ShipTeaser's corporate video pricing information.
Use a hybrid automated path when your launch calendar needs frequent short assets but your longer demo must show nuanced product behavior. The rule is simple: automate repetition, keep humans on persuasion. For more context on repeatable workflows, see automated content generation for product teams.
Distribution Across Launch Channels
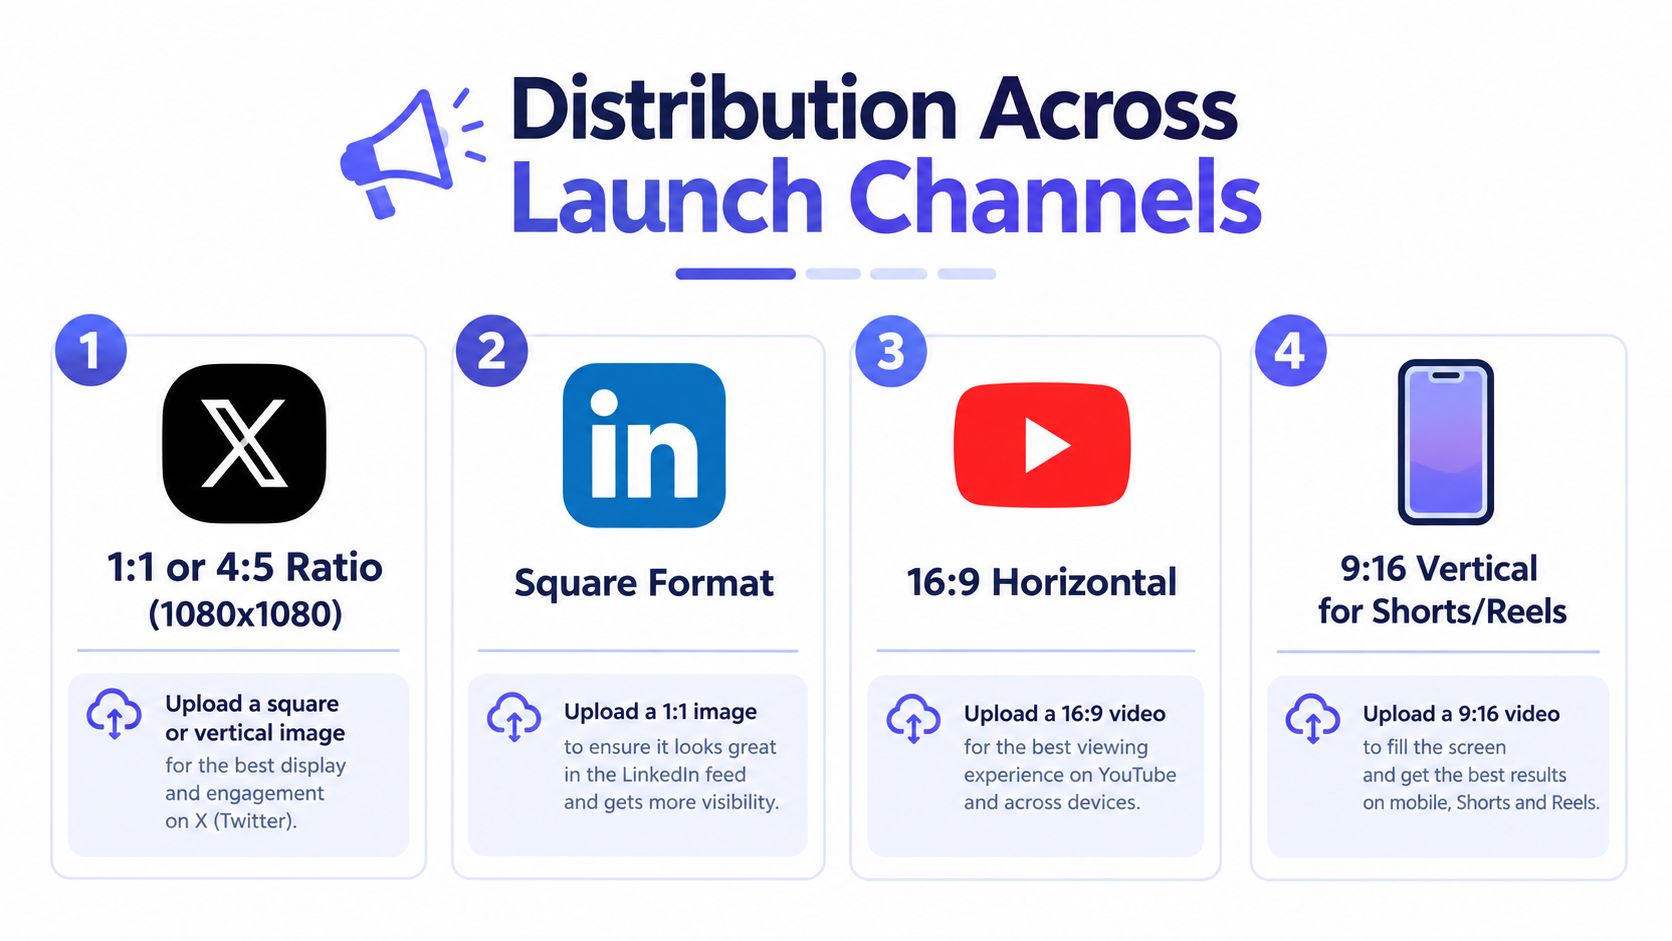
A good export can still fail if the upload hides the hook or sends viewers to the wrong page. Match the aspect ratio, first frame, caption, and CTA destination to the channel.
X and LinkedIn
For X, use a square or tall crop, with 1080x1080 or 1080x1350 as practical production sizes. Burn in captions. Make the first frame the hook because muted autoplay gives the viewer no spoken context. Keep the caption to one short setup line and one CTA. Send clicks to the page that matches the product claim, not the generic homepage.
LinkedIn also suits square or tall native video. Upload the file directly instead of relying on an external embed. Start the caption with the job-to-be-done, such as “Turn launch feedback into one review queue.” Keep the body concise, then send the viewer to the relevant feature or trial page.
A distribution workflow benefits from studying how other founders describe their launch assets. This account of how one writer tested Narrareach offers a useful reminder to connect the content format with the publishing action.
Product Hunt and YouTube
Product Hunt needs a 1270x760 hero image and can use an optional GIF or MP4 under 50MB. Treat the hero as the product promise, not a miniature video thumbnail. Put the demo in the first comment or maker gallery, then direct readers there with a short CTA.
For YouTube, use 16:9 at 1920x1080 for the walkthrough and a custom thumbnail at 1280x720. The thumbnail should show the product result, not a tiny interface packed with labels. Repurpose teaser cuts vertically at 1080x1920 for Shorts.
Use this publishing sequence:
- Post the teaser first.
- Publish the walkthrough 24 hours later.
- Reshape the strongest workflow into two posts per week for 30 days.
These channel specifications are operational guidance, not universal guarantees. Check each platform's current upload rules before scheduling a launch.
Metrics That Prove the Demo Worked
Views are useful for distribution, but they don't prove that the video helped the business. Measure each asset against its job.
For the teaser, watch-through rate and click-through rate are the useful signals. A practical target is above 60% watch-through and above 1.5% click-through, as defined in the campaign measurement framework for this format. Raw views can rise while the product claim remains unclear.
For the full walkthrough, watch average view duration above 50% and compare trial sign-ups or demo bookings during the post-publish window. A video earns more budget when it moves a downstream action, not when it collects passive impressions.
Instrument three layers
Platform analytics show reach, retention, and where viewers leave. Split mobile and desktop traffic. A strong average can hide a weak mobile experience if most of the audience watches on a smaller screen.
UTM-tagged links connect clicks to the session and landing page. Use separate campaign labels for X, LinkedIn, Product Hunt, YouTube, and email. Keep the CTA destination consistent with the claim in the video.
Page-level testing compares conversion with the video present against conversion with the video removed for at least seven days. Landing page benchmarks report an average conversion rate of 4.8% with embedded product video versus 2.9% without video, a 1.9 percentage-point lift in the cited sample. Review the demo video conversion benchmark for the methodology and limitations.
Fire these events:
- video_play
- video_50_percent
- video_complete
- cta_click
- trial_started
Don't count autoplay impressions as meaningful views. Don't treat one post as a verdict. Compare similar audiences, placements, and CTAs before changing the script.
A demo earns budget when it lifts a downstream number, not when it earns a view count.
The Next Seven Days
Don't start by choosing an editor. Start by choosing the one product job the launch must communicate.
Day 1: Define the audience segment and write the single claim the teaser must prove.
Day 2: Draft the five-beat teaser and the longer walkthrough outline. Give both to one person outside the company. Reject anything they can't understand without product context.
Day 3: Record the full walkthrough in one uninterrupted screen-capture session. Pull three possible teaser moments from the recording.
Day 4: Edit the walkthrough into a focused explanation. Cut the teaser to 15 seconds or less.
Day 5: Create the thumbnails, write the captions, and export 16:9, 1:1, and 9:16 versions.
Day 6: Schedule X, LinkedIn, Product Hunt, and YouTube Shorts using the applicable specifications. Use separate tagged links for every destination.
Day 7: Review the first metrics and choose the two numbers that best predict pipeline. Keep those numbers in the next launch brief.
Execute in that order. Don't run parallel heroics. The teaser should create attention, the walkthrough should answer evaluation questions, and the measurement setup should tell you whether either asset changed behavior.
ShipTeaser turns a product URL into a 15-second, 1080p, silent motion-graphics teaser in about two minutes, with hook, problem, solution, proof, and CTA scenes. Try the free first video, then visit ShipTeaser if you need a repeatable teaser cadence for upcoming launches.
FAQ
What is a SaaS product demo video?
A SaaS product demo video shows how software solves a specific user problem through a real workflow. The strongest setup uses a short teaser for attention and a longer walkthrough for evaluation, rather than forcing one video to serve every channel.
How long should a SaaS product demo video be?
A launch teaser should stay at 15 seconds or less. A longer walkthrough should usually run from 60 to 120 seconds, with the first useful product moment arriving quickly and every later scene supporting the same problem-to-solution story.
Should I automate a SaaS product demo video?
Automate short teasers when you need repeatable assets from an existing product page. Manually script and record longer walkthroughs when buyers need to understand a nuanced workflow, product judgment, or detailed outcome.
Does ShipTeaser add narration?
ShipTeaser produces silent motion-graphics teasers, so it doesn't add voice-over or narration. An optional music bed is available, and the format is designed for muted social feeds with on-screen visual communication.
What does ShipTeaser need to create a teaser?
ShipTeaser needs a product URL. ShipTeaser analyzes the page copy, screenshots, and visible brand cues, then produces a 15-second, 1080p teaser in about two minutes with exports for 16:9, 1:1, and 9:16.