You've found a useful YouTube clip, or you've uploaded a product demo and need a normal file for editing, archiving, or reposting. The download button alone doesn't answer the important questions: who controls the source, what quality will the export preserve, and will the resulting MP4 upload cleanly elsewhere?
To change a YouTube video to MP4, use YouTube Studio's Save to device or Download option when the video is your own upload. For someone else's video, a third-party converter may create an MP4, but access doesn't equal permission, and the file may contain incompatible codecs, lower-quality recoding, or unwanted software. Choose the route based on ownership and the job you need the file to perform.
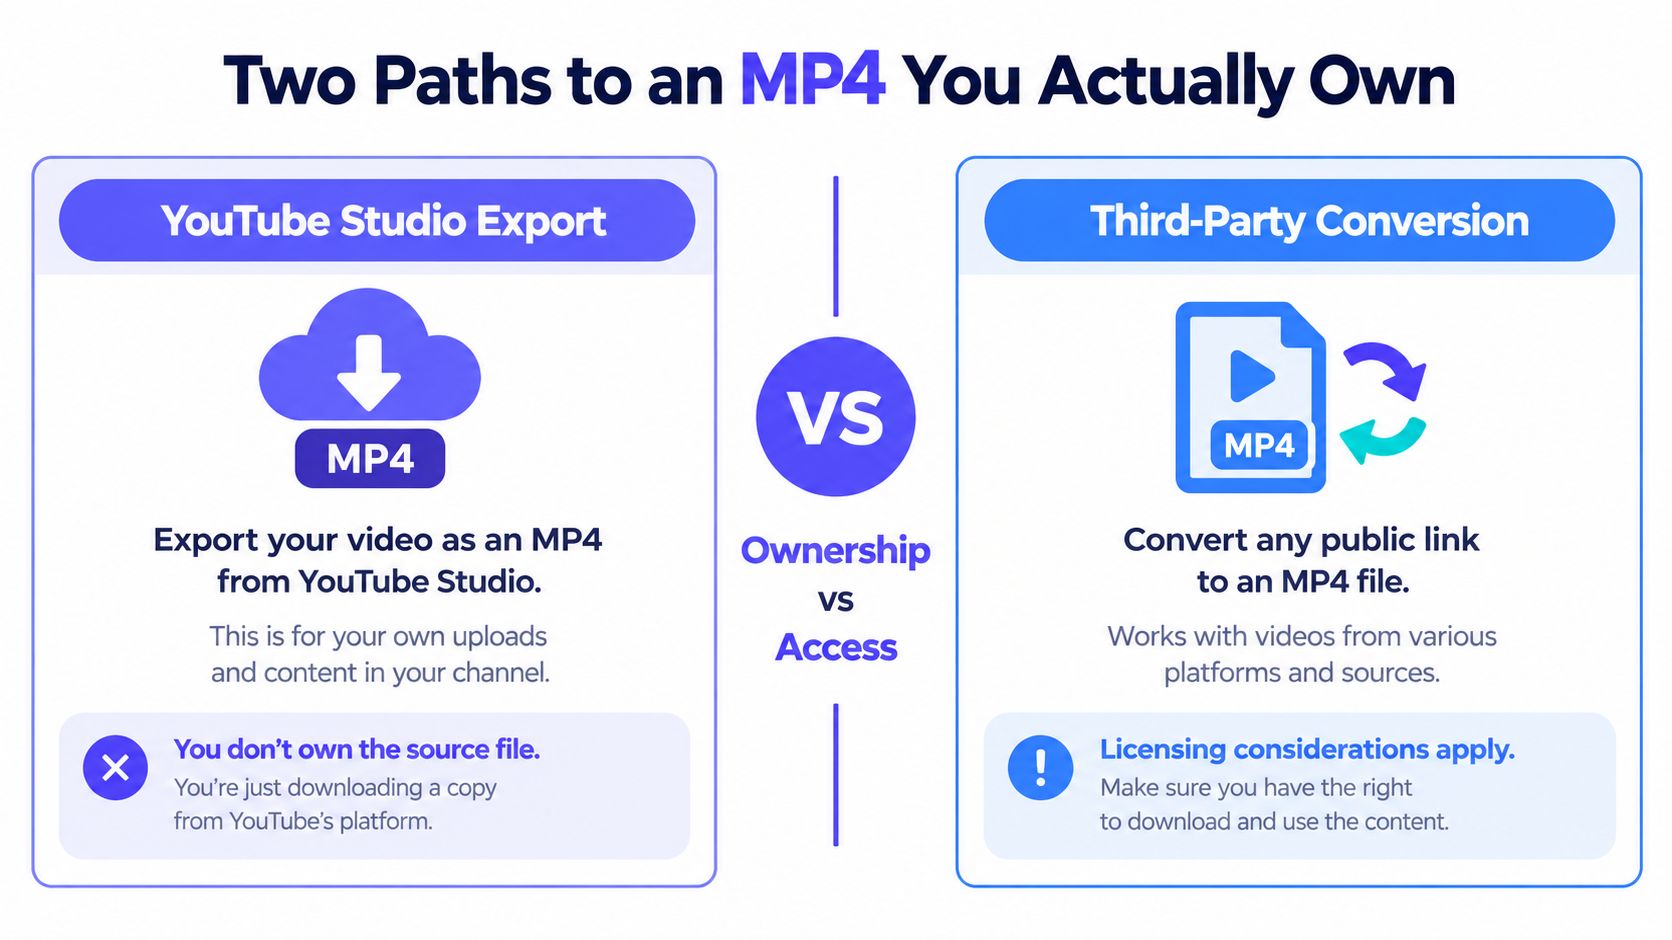
Two Paths to an MP4 You Actually Own
There are two practical routes. Owned uploads should go through YouTube Studio, while other clips require a rights check before any download. The right choice also depends on whether you only need personal playback or plan to edit, archive, or publish the file elsewhere.
Path one owned uploads
YouTube's official workflow is designed for videos you control. In the YouTube or YouTube Studio app, open Your videos or Content, select the upload, and choose Save to device. YouTube provides the download as an MP4, with 720p or 360p availability depending on video size, and limits an individual video to five downloads per day according to its official download guidance.
This route is clean from an operational standpoint. You know where the file came from, you avoid suspicious download pages, and you have a clear relationship with the source. The trade-off is quality. YouTube's export isn't a guaranteed high-resolution master, so don't treat it as a substitute for the original camera or editing file.
Path two third-party conversion
A third-party converter can be useful when the source isn't your upload and you have a legitimate reason to access it. It can also be useful when the official export is unavailable, but the workflow carries more risk. Ad-heavy pages, redirect chains, installer wrappers, unclear licensing, and aggressive recoding can turn a simple task into a security or quality problem.
For startup founders, the rule is straightforward:
Practical rule: If you uploaded the video, use Studio. If someone else uploaded it and you need the file for editing, archiving, or reposting, check the rights before downloading.
Review the practical difference in ShipTeaser's format comparison before choosing a workflow for a launch asset.
Exporting an MP4 Directly From YouTube Studio
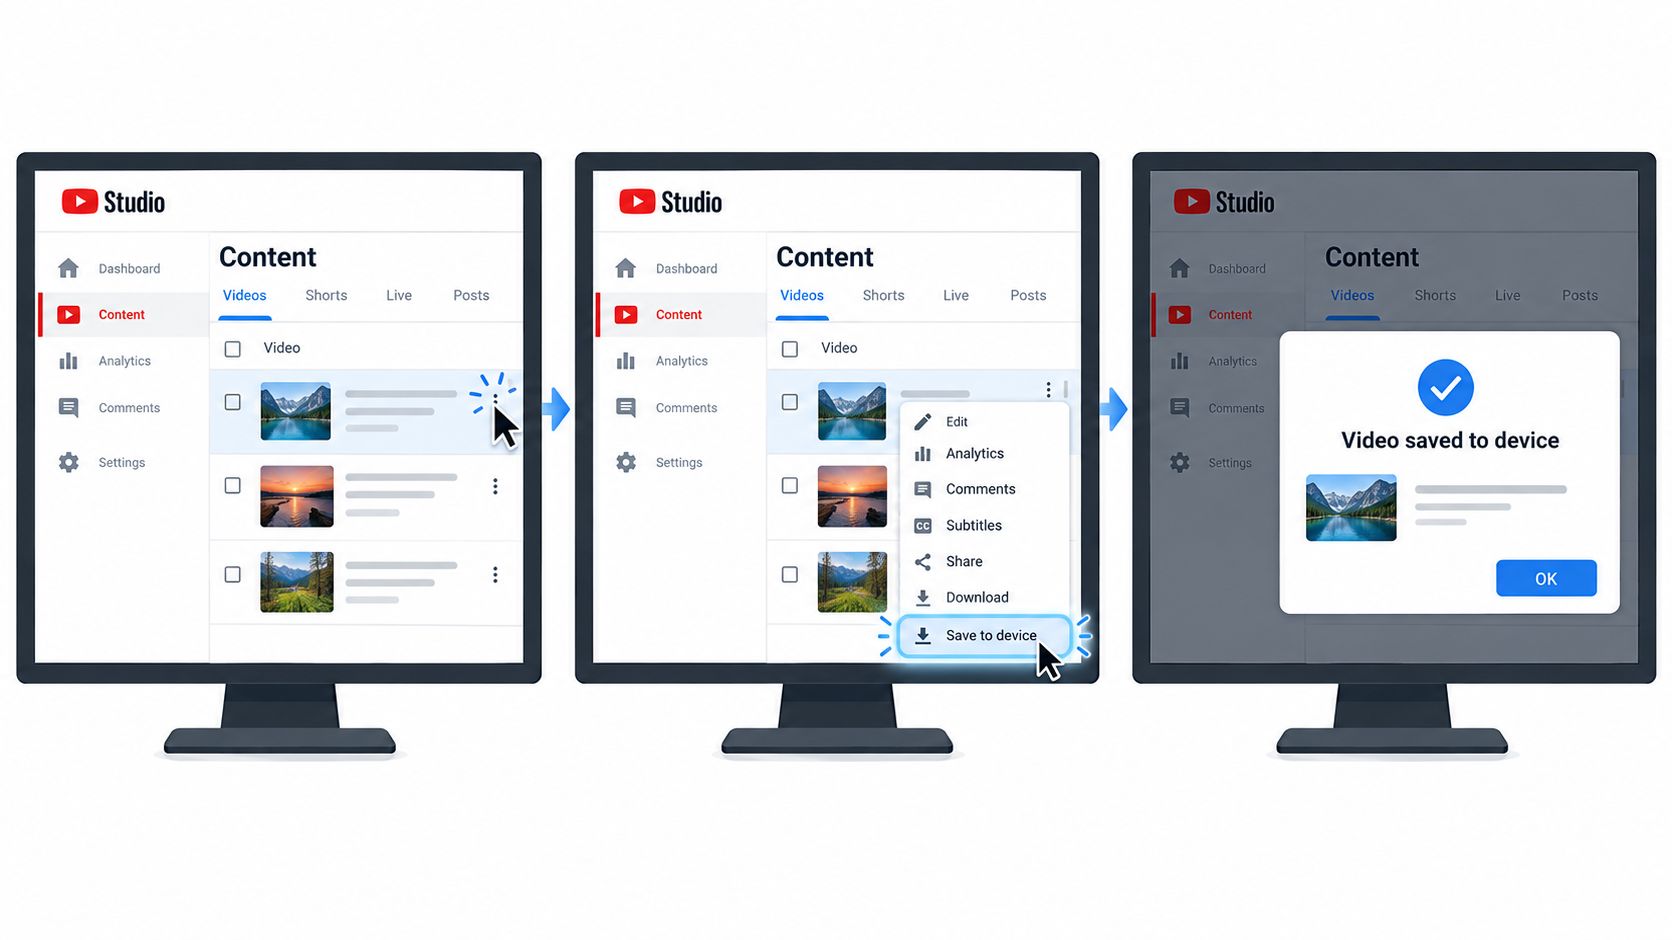
For a video you own, YouTube Studio should be the default export path. It gives you a legitimate copy tied to your upload and avoids questionable download pages that may alter the stream or package unwanted software.
Follow the Studio menu path
Open YouTube Studio, select Content, find the upload, open the three-dot menu beside its thumbnail, and choose Download. On mobile, open Your videos or Content, select the video, then choose Save to device.
The downloaded file contains video and audio tracks and keeps the original aspect ratio. YouTube normally provides 720p or 360p, depending on the video size, so do not treat this MP4 as a guaranteed 1080p or 4K master. The limit is covered in YouTube's help instructions for downloading your own videos.
Know what the export leaves behind
Captions are not embedded in the downloaded MP4. For notes, repurposing, or planning, use a separate YouTube transcript with AI workflow to capture the spoken content. Keep that text process separate from the video export.
The Download option may be unavailable if the upload has a Content ID claim, is private, or is age-restricted. YouTube can also block downloads for removed videos, videos with a copyright or Community Guidelines strike, videos using a preapproved audio track, or uploads that exceed the daily download limit. Resolve the restriction or claim where possible, then try again.
For clips you own, Studio is the cleanest legal route. It may still produce a compressed platform copy, so use the original camera or editing file when the final MP4 must survive additional editing or cross-platform posting.
When a Third-Party Converter Is the Right Call
Third-party conversion makes sense only after the ownership question is settled. For a file you already have locally, use a desktop conversion workflow. Desktop applications and command-line encoders give you more control over codecs, bitrate, audio channels, and output inspection.
For higher-quality streams, a command-line downloader paired with a local encoder can sometimes retrieve separate video and audio streams when the uploader hasn't disabled access. That process is more technical, and it still doesn't grant permission to reuse someone else's work.
Online converters are quicker, but they deserve a narrow role. They may load ad networks, redirect through installer pages, or re-encode the file at a lower bitrate than the source. I'd use one only for quick personal viewing on a trusted device, never as the default pipeline for a launch video you plan to edit or republish.
A practical comparison looks like this:
| Factor | YouTube Studio Export | Third-Party Converter |
|---|---|---|
| Source | Your own upload | A public link you can access |
| Permission | Tied to your channel and upload | Requires a separate rights check |
| Quality | MP4 at 720p or 360p depending on the video | May preserve or reduce source quality |
| Control | Limited export choices | More control over codecs and encoding |
| Main risk | Missing download option or limited resolution | Malware wrappers, redirects, and recoding artifacts |
| Best use | Recovering your own upload | A legitimate conversion workflow for an accessible source |
Before trusting an output, verify that the download page uses HTTPS and comes from a known domain. Then inspect the file in MediaInfo or a similar metadata reader. A focused guide to 4K YouTube to MP4 conversion can provide additional context on quality expectations, but don't assume a label guarantees a 4K result.
If your starting point is a product page rather than a YouTube clip, ShipTeaser's URL-to-video workflow follows a different path. ShipTeaser analyzes a public product URL and creates a downloadable teaser rather than extracting a third-party upload.
What MP4 Really Means and Why Files Still Fail
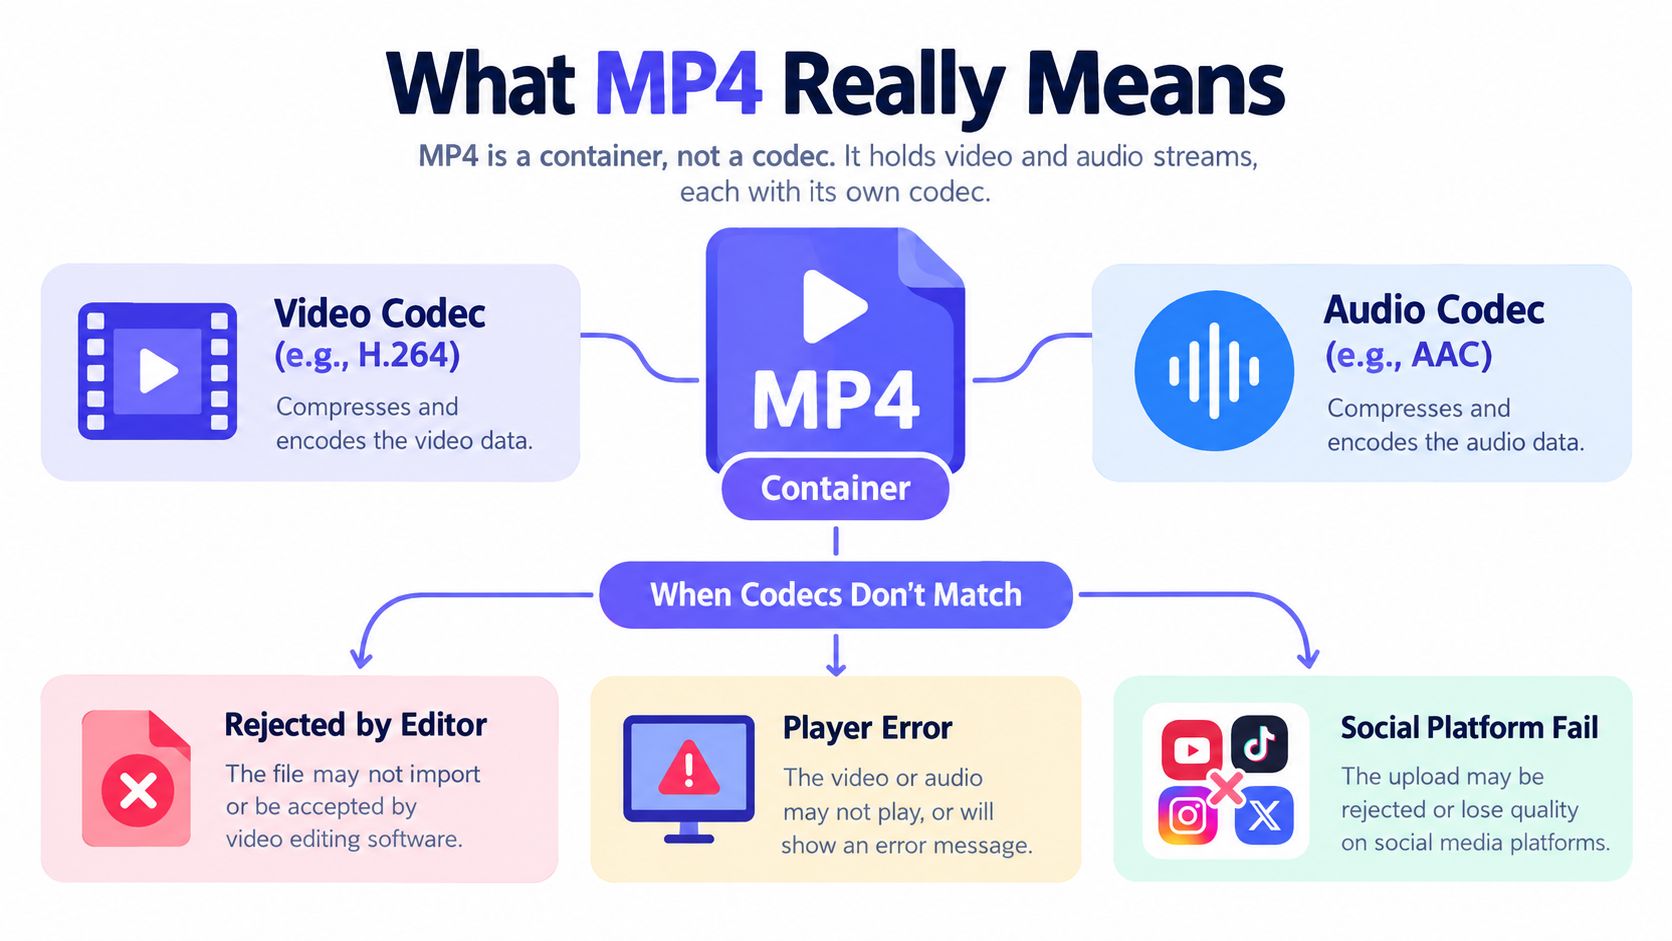
MP4 is a container, not a codec. The container is the wrapper that holds separate tracks and metadata. A file can end in .mp4 and still fail in an editor, media player, or social uploader because the video and audio codecs inside the wrapper aren't supported.
The tracks inside the wrapper
The MP4 wrapper is based on the ISO Base Media File Format. Inside it, you'll usually find a video track, an audio track, optional metadata, and sometimes subtitle or timed-text tracks.
Common video choices include H.264/AVC and H.265/HEVC. Audio may use AAC, Opus, or AC-3, especially when a file has been remuxed from a downloaded stream. The extension tells you almost nothing about those internal choices.
The combinations that usually post cleanly are H.264 video with AAC-LC stereo audio, a yuv420p pixel format, and a conventional frame rate. HEVC exports can cause trouble in older applications, while variable frame rate captures can create sync problems even though the file is technically valid MP4.
Diagnose the real failure
When an upload fails, inspect the file instead of converting it repeatedly. Check the video codec, pixel format, frame rate, audio codec, sample rate, channel layout, resolution, and whether the file contains a healthy index.
Rewrapping with FFmpeg using -c copy changes the container without re-encoding the media, so quality stays intact. Re-encoding with libx264 and a CRF between 18 and 23 is a safer universal fallback when the original tracks aren't compatible, but it creates a new generation of compression.
Don't chase the .mp4 extension. Chase the codec combination and playback behavior. If the file opens locally but fails on the destination platform, the container probably isn't the main problem.
Picking the Right Aspect Ratio and Resolution
Choose the destination before you convert. Resolution can't repair a bad crop, and exporting a video as vertical without planning the frame usually produces cut-off product screens, unreadable text, or empty space.
For standard YouTube and desktop viewing, use 16:9 at 1920×1080. For feed distribution, 1:1 at 1080×1080 is a practical square export. For Shorts, Reels, TikTok, and other mobile-first placements, use 9:16 at 1080×1920, which is identified as a standard vertical target in this aspect-ratio guide.
| Destination | Aspect ratio | Resolution | Frame rate |
|---|---|---|---|
| YouTube landscape | 16:9 | 1920×1080 | Match the source |
| Feed post | 1:1 | 1080×1080 | Match the source |
| Shorts and vertical social video | 9:16 | 1080×1920 | Match the source |
Use the source frame rate
Keep the source frame rate. Common valid choices include 24, 25, 30, or 60 fps, but don't interpolate just to make a file appear more polished. Interpolation can create unnatural movement and makes quality control harder.
The same source may need several compositions. A product interface that reads well in 16:9 may need a deliberate re-frame for 9:16, while a square crop can preserve enough context for a feed post. Guidance on social-media video sizes supports 16:9 for standard YouTube delivery and 9:16 for mobile-first short video.
Build safe compositions
For vertical delivery, keep critical titles and interface details in the central area instead of placing them against the edges. Avoid putting important information near platform controls, descriptions, or account labels.
Export from YouTube Studio at the highest resolution available, then re-frame or letterbox in an editor before the final encode. A single 1080p export isn't automatically suitable for every destination. For a more focused launch-video checklist, see ShipTeaser's launch video specs.
Legal and Terms of Service Boundaries
A YouTube upload belongs to the uploader only when the uploader owns the underlying footage or holds permission to redistribute it. Uploading a clip doesn't magically transfer rights to every person who can watch it.
YouTube supports downloading your own uploads through Studio, but that workflow doesn't create a license to download or republish another channel's video. A third-party download button changes access, not ownership. The distinction matters most when a founder turns a borrowed clip into a launch asset, course lesson, product demo, or AI input.
Separate viewing from reuse
Personal viewing and archiving can be different from public redistribution. Re-uploading someone else's clip, removing a watermark, repackaging footage into a paid course, or sending it into a generative system without permission can create copyright and platform problems.
Creative Commons content still requires attention. If a clip uses a Creative Commons license, follow its attribution terms and cite the license when you re-upload or adapt the material. Don't assume “public” means “free to reuse.”
Operator's rule: Own the source, license anything you don't own, and export only from footage you're allowed to control.
For startup teams, this rule is more useful than a long list of converter sites. Keep written licenses, source URLs, and attribution requirements with the project files before publication.
A Repeatable MP4 Workflow for Founders
Founders need a process that survives the next launch, not a clever download trick that works once. Run the same checks every time, and keep the original source separate from platform exports.
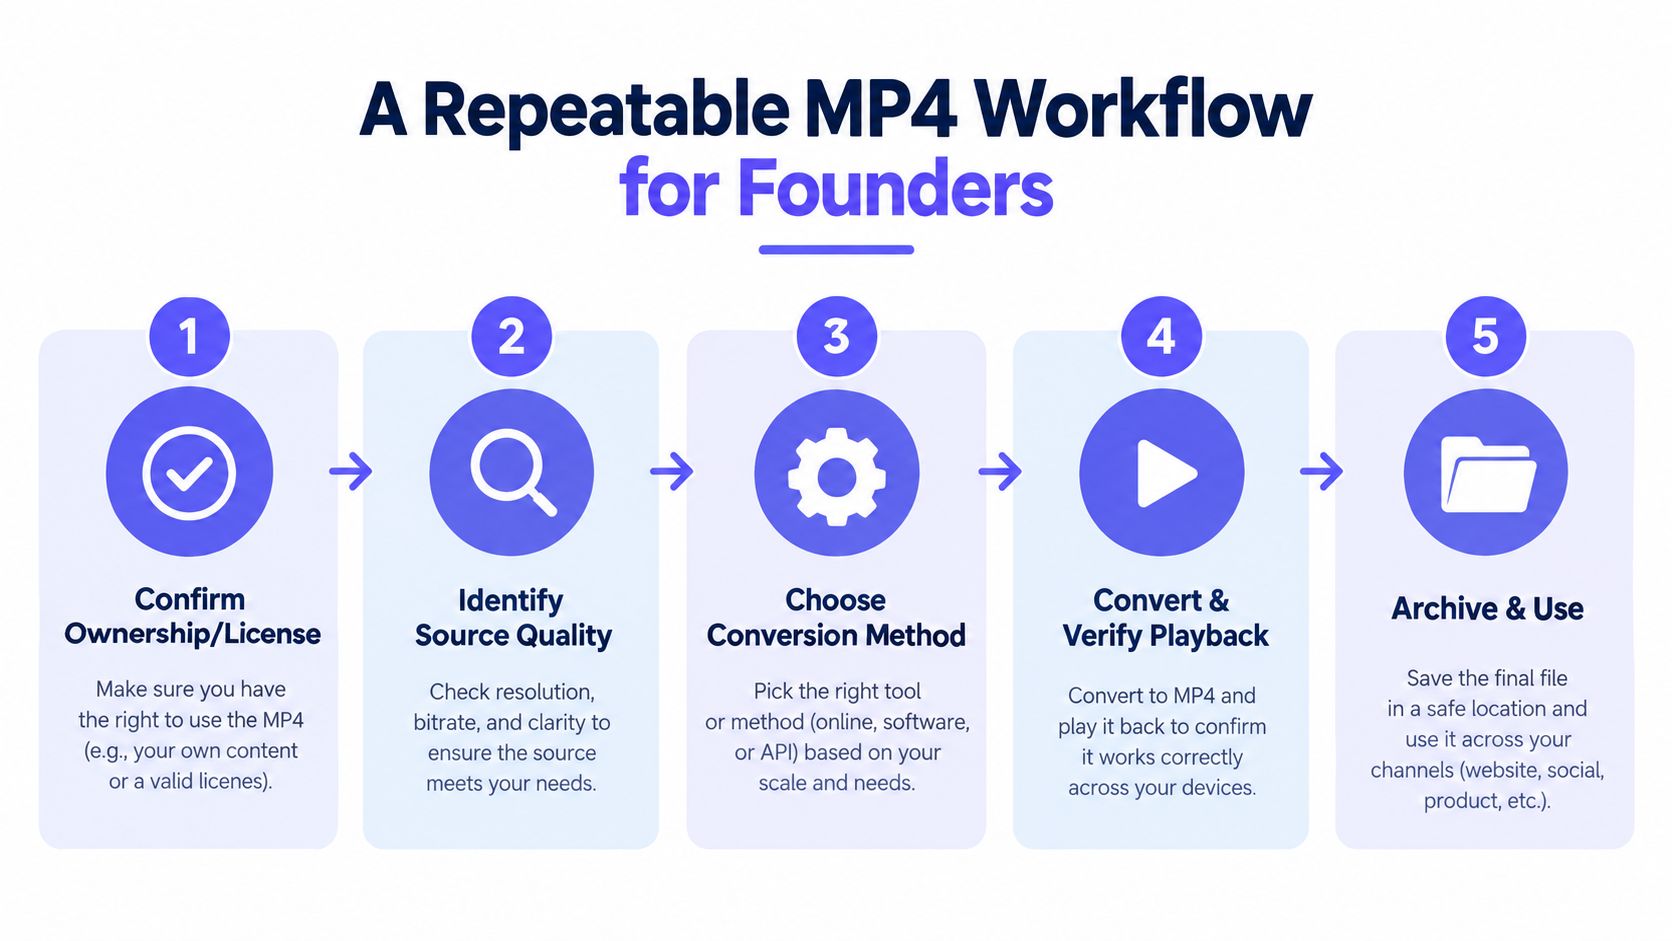
Confirm ownership or licensing. Verify that you own the clip or have permission to download, edit, and publish it. Save the license or written approval in the project folder.
Identify source quality. Keep the original camera or editing master offline. YouTube is a distribution copy, not a dependable archive of your highest-quality source.
Choose the conversion method. Use Studio for your own upload. For a legitimate local conversion, use a trusted desktop workflow and target H.264 video with AAC audio when broad compatibility matters.
Convert and verify playback. Inspect the MP4 with MediaInfo or VLC. Confirm the codec, resolution, frame rate, audio channels, and aspect ratio before uploading.
Post and watch the first render. Upload to LinkedIn, Instagram, TikTok, a course platform, or another approved destination. Check for blocking, letterboxing, missing audio, and damaged crops.
Archive the working set. Store the original master, YouTube URL, license details, and exported MP4 in one project folder. A founder should be able to repeat the process without re-deciding every technical detail.
When several assets need to sit together in a launch presentation, guidance on how to create unified AV playlists can help organize mixed media. For product launches, ShipTeaser's landing-page video workflow starts with the product page instead of a YouTube upload.
FAQ
Can I change any YouTube video to MP4?
A third-party converter may create an MP4 from an accessible public link, but access doesn't establish permission to download, edit, or republish the video. Use YouTube Studio for your own uploads and check licensing before handling someone else's content.
Does YouTube Studio download videos in 1080p?
YouTube's official download workflow provides owned uploads as MP4 files at 720p or 360p depending on the video size. Studio doesn't guarantee a 1080p or 4K downloadable export, so keep the original master if resolution matters.
Why does an MP4 still fail to upload?
MP4 is a container, so the file can still contain unsupported video or audio codecs. Check the internal tracks, pixel format, frame rate, audio layout, and metadata rather than relying on the .mp4 extension.
Should I use an online converter for a product launch?
Use an online converter only for a quick personal-viewing copy on a trusted device. For a launch asset you'll edit, archive, or republish, use an owned Studio export or a controlled desktop conversion workflow after confirming the rights.
Can ShipTeaser create a YouTube MP4?
ShipTeaser creates a 15-second, 1080p, silent motion-graphics teaser from a product URL, with hook, problem, solution, proof, and CTA scenes. ShipTeaser outputs 16:9, 1:1, and 9:16 versions, includes an optional music bed, and offers a free first video without a credit card.
If you're launching a software product, paste your landing page into ShipTeaser to generate a downloadable 15-second 1080p MP4 teaser in about 2 minutes. The first video is free with no credit card, and paid plans are $99/mo for 1 video per week, $149 for 2 per week, or $199 for 4 per week.