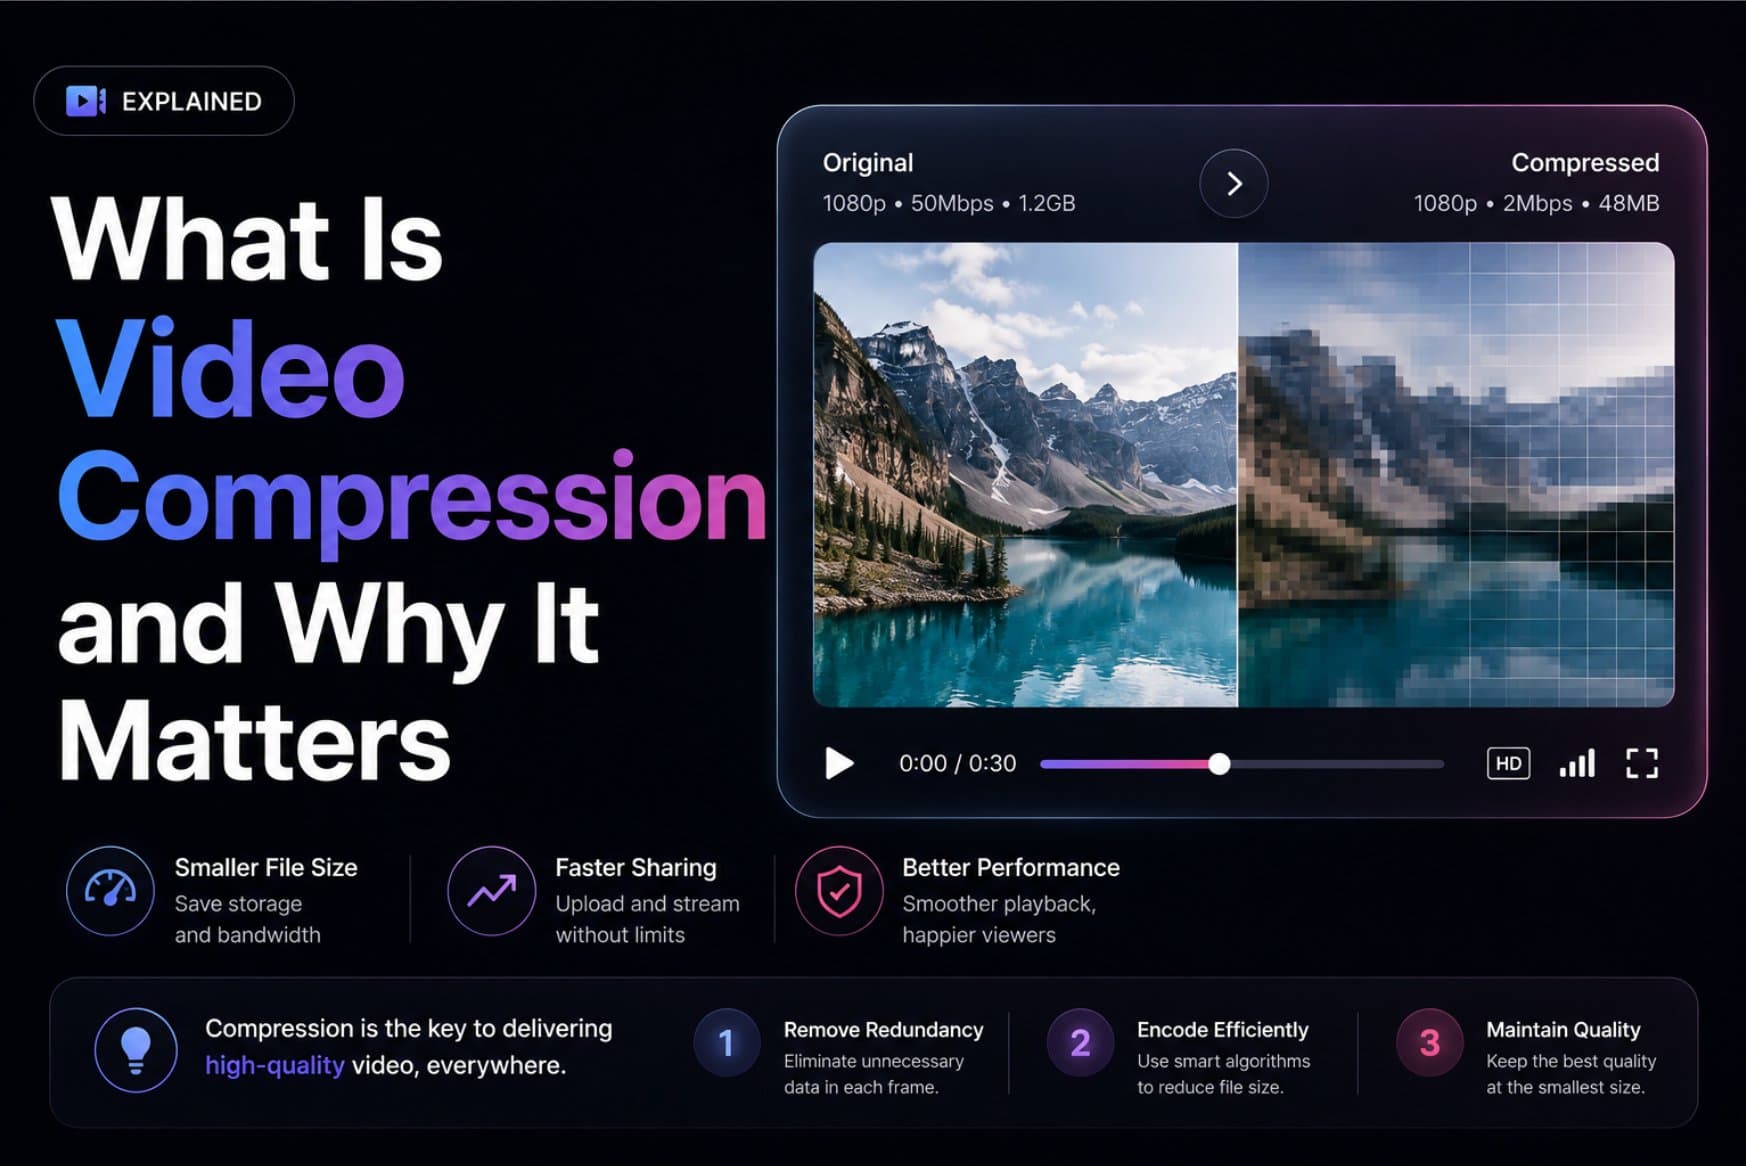
H.264 typically delivers the broadest compatibility, while HEVC can provide about 50% lower bitrate than H.264 at equivalent quality, and AV1 can save roughly 30% more than HEVC in many delivery scenarios. Video compression is the process of shrinking video data so it can be stored, uploaded, and streamed without consuming all your bandwidth.
You've just finished a 15-second product teaser. The opening frame looks sharp, the logo is readable, and the call to action lands before the loop begins. Then you export it, wait for the upload, and discover that the file is too large, the text looks muddy after posting, or the video won't play correctly on part of your audience's devices.
Think of raw video as a wardrobe dumped across the floor. Compression folds, stacks, and zips those clothes into a carry-on that fits in the overhead bin. The challenge is folding it tightly enough to travel easily without crushing the shirt you need to wear, which is exactly the balance a video encoder tries to find.
For a short social teaser, compression affects more than file size. It influences how quickly the clip loads, how cleanly text and product screens survive platform processing, how much computing power the export requires, and whether the video plays for the person who sees it. The right question isn't “How small can I make this file?” It's, “What's the smallest file that still looks intentional and plays reliably?”
How Video Compression Works

A 15-second teaser can look crisp in your editor and arrive as a blurry, oversized upload. The export decision determines whether its logo stays readable, whether motion remains clean, and whether viewers can play it without waiting. Video compression encodes those frames into a smaller representation, reducing the bytes required for storage and delivery while retaining enough visual quality for the intended audience.
Raw video is like an uncompressed archive of visual observations. Every frame contains color, brightness, edges, textures, and movement, while the audio track adds another stream of data. An encoder searches for information it can describe more efficiently, rather than treating every pixel as equally valuable.
A static background may remain nearly unchanged while a product screen or a person's hand moves across it. The codec can record what stays consistent and describe only the changing parts. That shared information is one reason neighboring frames can require less data than a complete, independent description of each frame.
The tradeoff is the product
Compression always involves choices. You balance visual quality, bitrate, encoding time, device compatibility, and file size. An aggressive export may upload quickly but create blocky motion, smeared text, or banding in gradients. A lightly compressed master may look excellent while taking longer to upload and using more storage.
The technical name for this balance is a rate-distortion tradeoff. The encoder spends a limited number of bits where viewers are most likely to notice changes. A lower bitrate reduces storage and delivery demands, but leaves less information for complex motion, fine detail, and small type. The rate-distortion role of modern codecs and their delivery savings is described in this overview of multi-codec video compression.
For a founder shipping a teaser, the working definition is simple:
Video compression turns visual information into a smaller stream of data, then chooses which details to preserve so the clip remains convincing at its destination.
That destination sets the priority. An editing file should preserve fidelity for future changes. A muted social teaser should load promptly, play across likely devices, and keep its branding legible on a small screen. Choose the smallest export that still looks intentional and plays reliably.
The Three Knobs Behind Every Export
Most export panels look crowded, but three controls explain most of what happens to a 15-second social teaser: codec, container, and bitrate. Their settings determine how the file is encoded, packaged, and given room to preserve detail.
The codec is the method used to analyze frames, predict movement, remove repeated information, and reconstruct the video during playback. H.264, HEVC, and AV1 are codecs. Choosing one affects visual efficiency, encoding time, and whether likely viewing devices can play the result.
The container packages the video track, audio track, timing information, subtitles, and metadata together. MP4 and MOV are containers. Two files can hold visually identical video while using different containers, and a publishing destination may accept one more reliably than the other.
The bitrate sets the data budget for each second of video. More available bits give the encoder room for motion, texture, gradients, and small type. A tighter budget requires it to discard or simplify more detail, which can make scrolling screens, confetti, smoke, or fine text look rough.

What happens inside the codec
Codecs generally combine two strategies:
- Intraframe compression describes a frame using information within that frame, much like compressing a single photograph.
- Interframe compression compares neighboring frames and records changes between them. A fixed background can be reused while moving elements receive new information.
A static product mockup therefore gives the encoder an easier workload than a fast screen scroll or noisy texture. The more changing detail each moment contains, the more bitrate the export may need to stay clear.
Which control deserves your attention
For a 15-second teaser, start with a compatible codec, use a widely accepted container, and set a bitrate that keeps branding, small type, and motion readable without producing an oversized file.
An MP4 extension identifies the container only. Quality also depends on the codec, bitrate, resolution, frame rate, source material, and encoder settings. Check the rendered file on the intended small screen before shipping.
Lossy vs Lossless and When Each Makes Sense
Lossy compression permanently removes some information to achieve a much smaller file. The decoder reconstructs a visually similar result, but it can't restore every discarded detail. Lossless compression preserves the original data so the decoded result matches the source exactly.
For distribution, lossy compression is usually the practical choice. A social teaser needs to look clean on the viewer's device, not preserve every source pixel for future frame-by-frame restoration. The file has a job, and that job is to communicate a product quickly while loading and playing reliably.
Lossless is a working asset
Lossless or lightly compressed video makes sense when the file will return to an editing workflow. An editor may need to change the opening, replace a screen recording, adjust color, or create multiple versions. Keeping more source information gives later exports a stronger starting point.
It also suits archival masters and workflows where repeated re-encoding could gradually degrade the image. In those cases, the extra storage and processing burden can be justified because the file remains a source asset rather than a final social delivery file.

Lossy is appropriate for the teaser
A sensible lossy encode can keep a 15-second clip sharp enough for phone viewing while reducing the upload burden dramatically compared with a lossless export. The exact result depends on resolution, movement, text density, frame rate, and the encoder, so don't treat a single file-size target as a universal quality test.
The mistake is compressing the source repeatedly. Export a clean master, then create the delivery version from that master. Avoid taking an already compressed social file, editing it, and compressing it again unless you have no alternative.
Use this rule:
- Choose lossless or a high-fidelity master when you expect future edits.
- Choose lossy delivery compression when the clip is finished and needs to reach a feed.
- Review the encoded file, not just the editor preview, because artifacts often appear after export.
Lossy doesn't mean careless. It means you're spending information on the details viewers can perceive and removing information they won't miss.
The Codec Ladder From H.264 to AV1
Codec history explains why export menus keep adding choices. Early compression research eventually led to practical digital standards, then to codecs designed for web delivery and higher visual efficiency. This history of video compression traces those early milestones.
For a 15-second teaser, the useful ladder is H.264, HEVC, then AV1. Each step can reduce the bits needed for a similar-looking picture, but each also changes compatibility, encoding time, and workflow risk.
H.264 is the compatibility baseline
H.264, also called AVC, was developed between 1998 and 2003 and first published in 2004. It remains the practical workhorse because browsers, phones, editing applications, and publishing systems widely support it.
That reach matters when the teaser must play reliably across unknown devices. Newer codecs may represent similar visual quality with fewer bits, yet a smaller file has little value if a viewer's device, browser, or destination cannot decode it.
HEVC reduces the delivery burden
HEVC, or H.265, was approved in January 2013 and formally published in June 2013. It is the major generation after H.264, with commonly reported streaming results showing roughly 50% lower bitrate than H.264 at equivalent quality. The standard's history and positioning relative to H.264 are documented in this HEVC reference.
That reduction can help with high-resolution libraries or controlled delivery, where supported devices and publishing paths are known. For a teaser sent to an unfamiliar audience, confirm playback support before making HEVC the only export.
AV1 pushes efficiency further
AV1 can reduce bitrate further than HEVC, and comparative testing examines its efficiency alongside HEVC and VVC. A comparative study of AV1, HEVC, and VVC examines this efficiency-versus-complexity tradeoff. The practical question is whether the smaller delivery file repays the extra work needed to create and support it.
AV1 often requires more computation than HEVC. Encoding may take longer and demand more CPU or GPU capacity, which matters if a founder needs to revise a teaser and publish it quickly. It can make sense for planned delivery tiers, large libraries, or audiences known to support it.
For a founder, the ladder is a decision, not a ranking: choose H.264 for reach, HEVC for efficiency where support is confirmed, and AV1 when its savings justify the added encoding cost and workflow complexity. For a teaser that must ship today, export a broadly compatible fallback before testing a newer codec.
Encoding Settings for a 15-Second Social Teaser
Start with the destination, not the export panel. A vertical feed needs a vertical canvas, while a website hero or horizontal announcement needs a horizontal one. The content should fill the intended frame without forcing the publishing system to crop important text or product UI.
| Format | Resolution | Codec | Container | Target Bitrate | Frame Rate |
|---|---|---|---|---|---|
| Vertical social teaser | 1080 × 1920 | H.264 | MP4 | 5 to 8 Mbps | 30 fps |
| Landscape social teaser | 1920 × 1080 | H.264 | MP4 | 5 to 8 Mbps | 30 fps |
| Square teaser | 1080 × 1080 | H.264 | MP4 | 5 to 8 Mbps | 30 fps |
Set the core video controls
Choose H.264 inside an MP4 container when you need a low-risk publishing file. Set the frame rate to 30 fps for a typical 15-second teaser, especially when the footage doesn't depend on fast sports-style motion or elaborate animation. A 60 fps export carries more frames and raises the bitrate burden without automatically making a restrained product teaser more persuasive.
For 1080p, use a target bitrate of 5 to 8 Mbps. Bitrate is the budget available for each second of motion, so scenes with scrolling interfaces, tiny type, fast transitions, or detailed textures benefit from the upper end. A clean product shot with restrained movement may not need as much.
If your encoder supports it, use two-pass encoding for a finished file. The first pass analyzes the content, and the second distributes bits with more awareness of where the scene needs them. That can help a short clip allocate data more intelligently than a single rushed pass.
Control seeking and audio
Set keyframes at 1 to 2-second intervals when the destination benefits from quick seeking, looping, or predictable segment handling. A keyframe is a self-contained reference frame. Shorter intervals make the file easier to enter at different points, though they can reduce the space available for interframe savings.
Use AAC stereo audio for a standard social export. Keep in mind that many viewers encounter teasers muted, so the visual sequence should communicate without narration or music. Check the finished file on a phone before uploading, and use the practical guidance in this Instagram video format guide when the destination has its own requirements.
How Compression Affects Distribution and Branding
Your upload usually isn't the final file your audience receives. Social destinations often process uploaded videos again to create versions suited to different devices, connections, and playback contexts. That second pass can expose weaknesses that weren't obvious in your local export.
If the source is already heavily compressed, the next encode has less clean information to work with. Fine type may dissolve, flat color areas may show banding, and fast movement may turn into blocks or smears. Start with a clean delivery file and give the destination enough visual information to work from.
Protect the first seconds
The opening frames carry the brand's first impression. A logo, headline, product screenshot, or interface detail must remain recognizable while the clip autoplays, often muted and inside a small viewport.
Keep the first visual transition purposeful rather than chaotic. Reserve enough bitrate for text-heavy frames, avoid placing essential copy over noisy footage, and inspect the result at phone size instead of judging it only on a large editing monitor.
Branding rule: Compression should remove invisible detail before it removes the letters, colors, and interface cues that explain what you're selling.
Color can also suffer when an export is pushed too hard. Gradients in backgrounds, dark product screens, and subtle brand tones may break into visible bands. A clean source, restrained motion, and a codec with adequate bitrate give those elements a better chance of surviving delivery processing.
Design for muted playback
A teaser should make sense with audio disabled. Use readable on-screen language, clear visual hierarchy, and motion that supports the message rather than forcing the viewer to decode a rapid sequence of changes.
This is a creative decision as much as a technical one. The advice in this guide to creating on-brand video without a designer is relevant because compression preserves brand cues more reliably when those cues are deliberate, simple, and visible in the source.
Compression therefore belongs in the branding conversation. A beautifully designed teaser can lose its authority when small type becomes mushy or a product screen turns into an indistinct rectangle. Export quality won't fix an unclear concept, but a careless export can weaken a clear one.
Why H.264 Is Still the Default for Most Builders
The newest codec isn't automatically the right codec for a launch. H.264 remains the default for most real-world deployments, while the decision to move to a newer option depends on whether the bandwidth savings or distribution needs justify possible compatibility and workflow friction. Industry coverage of the 2025 video codec market describes H.264 as the prevailing default and frames codec choice around deployment needs.
That matters for a small team. You may not control the viewer's phone, browser, operating system, hardware decoder, or publishing pipeline. You may also need the teaser today, not after a long encoding queue or a compatibility investigation.
Use a reason, not a trend
HEVC and AV1 can reduce bitrate, but efficiency is only one part of the decision. Ask:
- Who needs to play it? Broad public reach favors the format with the widest established support.
- Where will it live? A controlled app or delivery system may let you test newer codecs safely.
- What does encoding cost? AV1's higher complexity can increase compute demand and turnaround time.
- What happens when the destination re-encodes it? A smaller source isn't useful if the publishing path mishandles it.
For a 15-second teaser intended for broad social distribution, H.264 in MP4 is a sensible starting point. Generate a newer-codec version when you have a measured reason, such as a controlled playback environment, a large delivery library, or a bandwidth constraint that outweighs the additional operational work.
A practical approach is to treat codec selection as a launch risk decision. If compatibility failure would cost more than the storage or delivery savings, ship H.264. If you can test the full playback path and the savings matter, evaluate HEVC or AV1 as an additional output rather than replacing the dependable baseline immediately.
A Pre-Export Checklist for Shipping the Teaser
Before you press export, run the file through a short practical check. The goal isn't technical perfection. It's a teaser that loads, plays, communicates, and still looks like your product after delivery processing.
- Choose H.264 unless you have a specific reason to use HEVC or AV1. Compatibility is usually the first constraint for a broad social audience.
- Use an MP4 container and AAC stereo audio. Keep the package conventional and check playback outside the editing application.
- Set 1080p output at 5 to 8 Mbps for a typical 30 fps teaser. Move toward the upper end when the clip contains dense text, fast movement, or detailed screens.
- Use keyframes at 1 to 2-second intervals when seeking and looping matter. Review the exported file for clean starts and transitions.
- Watch the finished file muted on a phone. Confirm that the opening frame, product name, call to action, and brand colors remain clear without sound.
Check the destination's upload limit before you finalize the file. Also confirm the aspect ratio, because a technically clean teaser can still fail visually if the platform crops the headline or places interface controls over essential content. Use this launch video specs reference as a final destination check.
If you're generating teasers from a product page, ShipTeaser can analyze the page's copy, screenshots, and visible brand cues to create a downloadable 15-second promotional video in an MP4 format. That can give a small team a repeatable starting asset, which you can then inspect against the same codec, bitrate, readability, and muted-playback checklist.
ShipTeaser turns a submitted product URL into a short promotional video by extracting page messaging, screenshots, and brand cues, then assembling a downloadable teaser for social or launch channels. Visit ShipTeaser, generate your next 15-second asset, and run the exported file through the checklist before you publish.